Replace your Homelab VPN with Cloudflare Zero Trust
Zero Trust is a platform for small businesses and enterprises to offer secure access to their networks and applications...which sounds perfect for my five-user household 🙂; oh, and it's Free!

Zero Trust is a platform for small businesses and enterprises to offer secure access to their networks and applications...which sounds perfect for my five-user household 🙂; oh, and it's Free! I currently run Ubiquiti and Synology gear in my Homelab, which offers me several options for hosting my own OpenVPN, LT2P, and Wireguard VPN servers. These have been solid solutions for me over the years, though they have their downsides. VPNs can be complicated for end users, in this case, my family, to get up and running on each device. Once set up, they also have access to the entire network when they may only need NAS or Plex access, for example. I think identity-aware services like Zero Trust are an excellent alternative in these use cases. Very simple to manage, deploy, and set up application-level access through easy-to-understand policies. I also see this complimenting my Wireguard VPN running on my UDM Pro, not necessarily as a complete replacement, though it certainly can be.
In this post, I'll focus on the Free tier of Zero Trust and my primary use case for removing the need for VPN access and administration for other household members.
Prerequisites
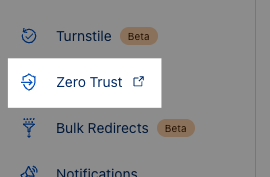
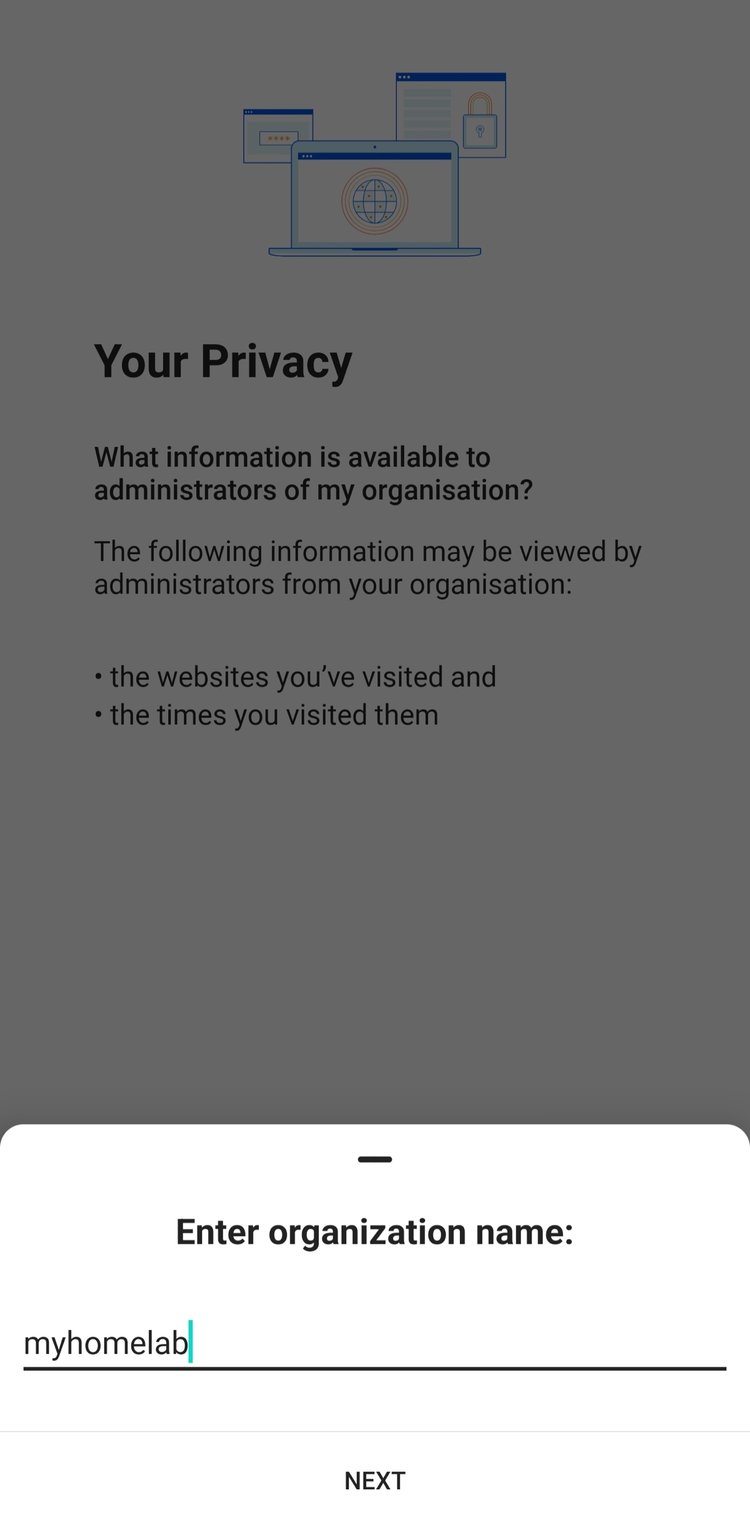
First, you must enable Zero trust and assign a Team domain; for example yourdomain.cloudflareaccess.com. This is as simple as logging into your Cloudflare account, clicking on Zero Trust in the left nav of the dashboard, and going through the setup.

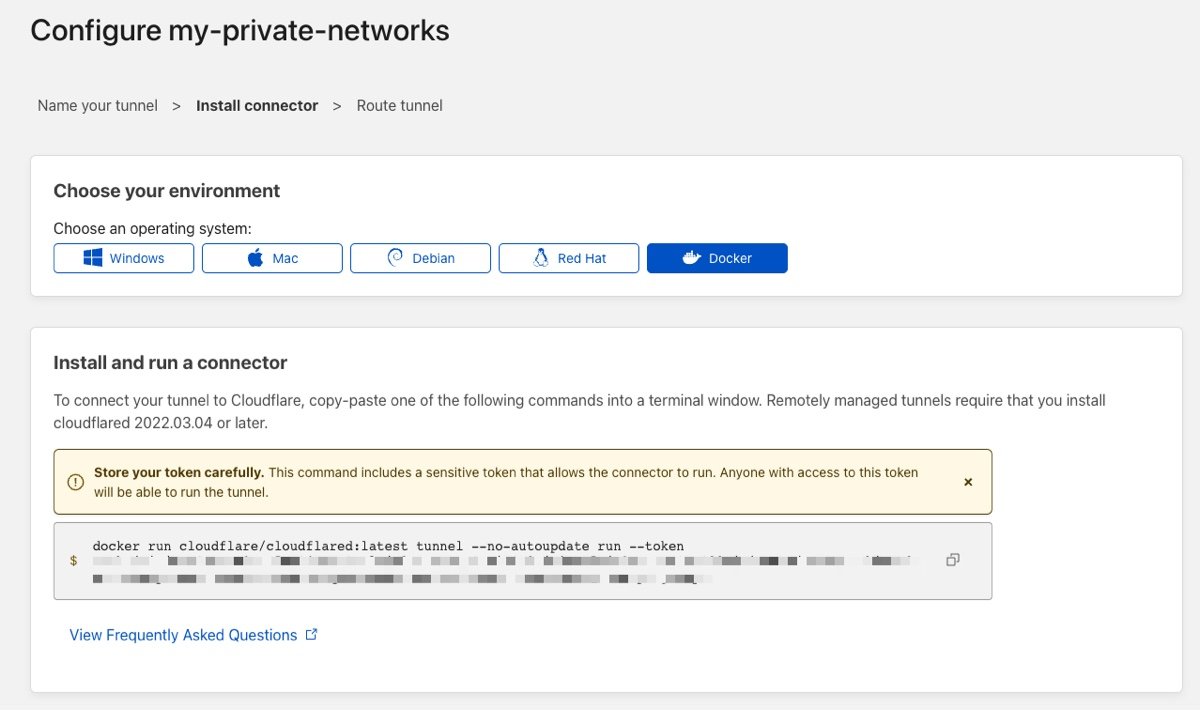
Second, you'll need to establish and host a Cloudflared tunnel on your private network. I cover how to do this in a previous post; however, you can create and manage your tunnel config within the Zero Trust Access→Tunnels dashboard. If starting new, I recommend going through the dashboard. I'll also link to Cloudflare's excellent tutorials below for additional context.
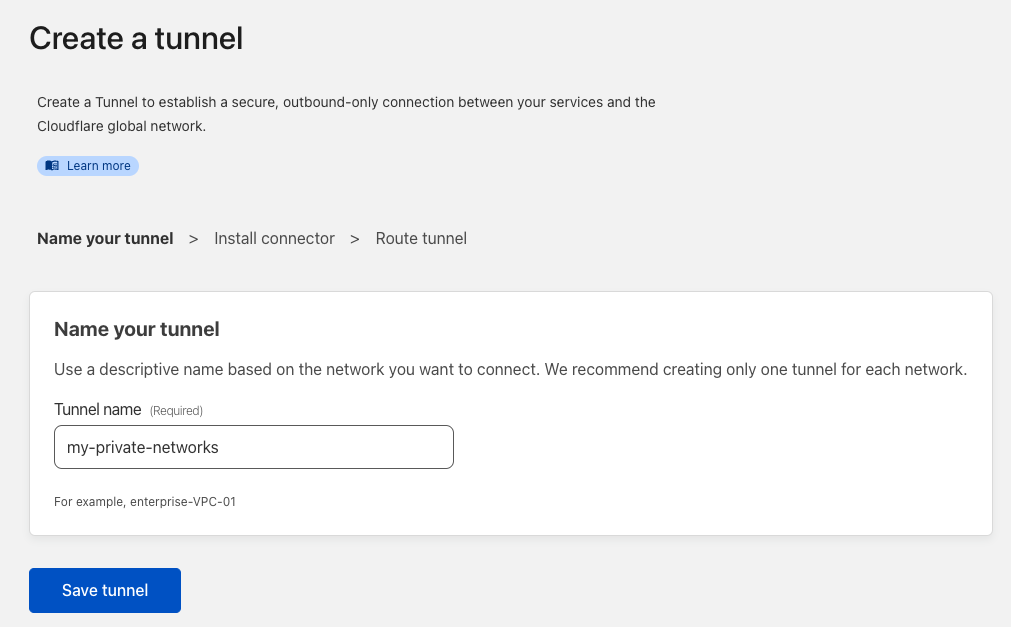
For running your connector/tunnel, I recommend Docker; however, any metal or VM within your network that is always on will do. I also recommend using an orchestrator like Docker Swarm if you want higher availability of your tunnel, which I also cover in a previous post.

Authentication
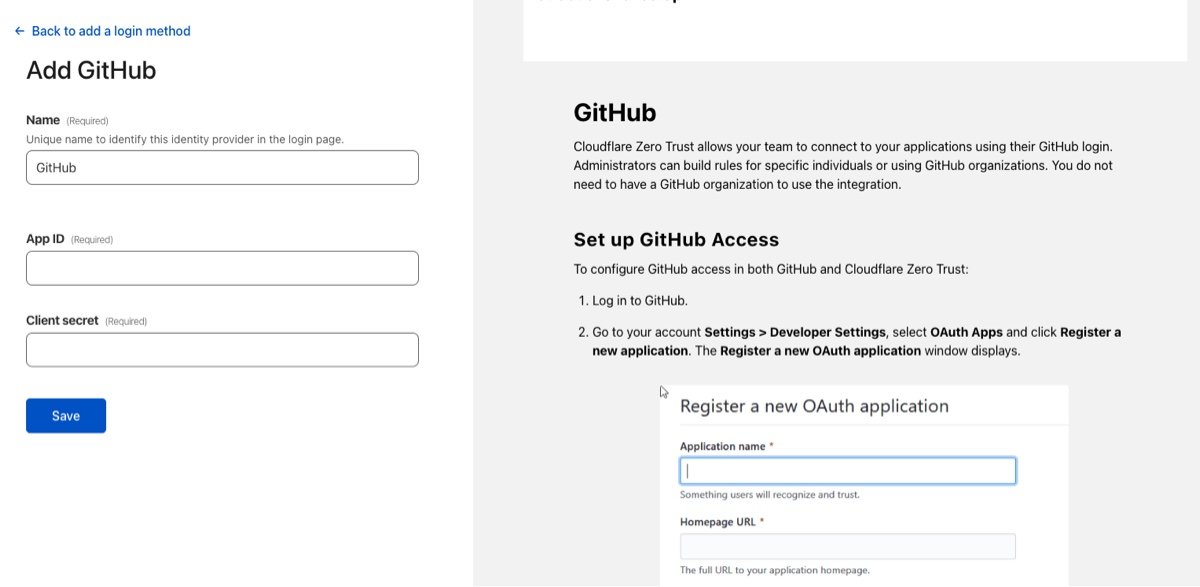
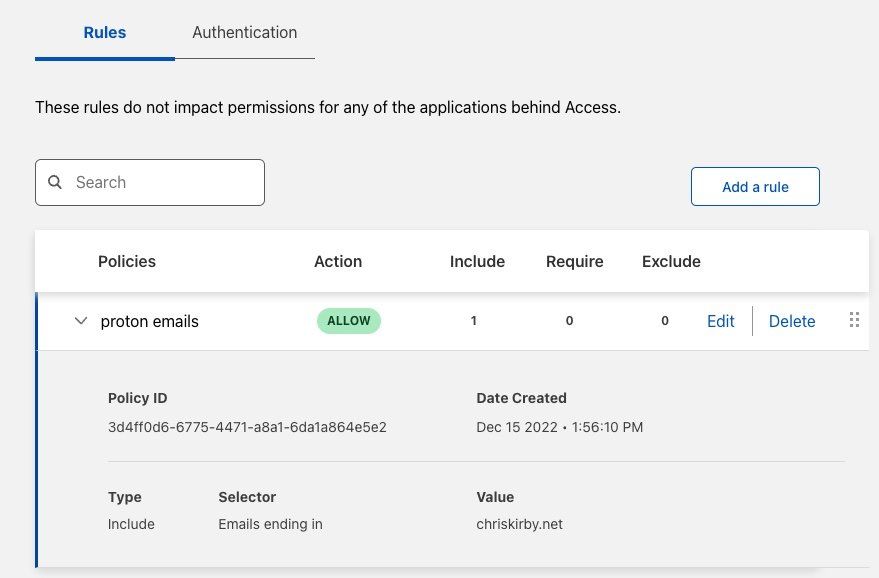
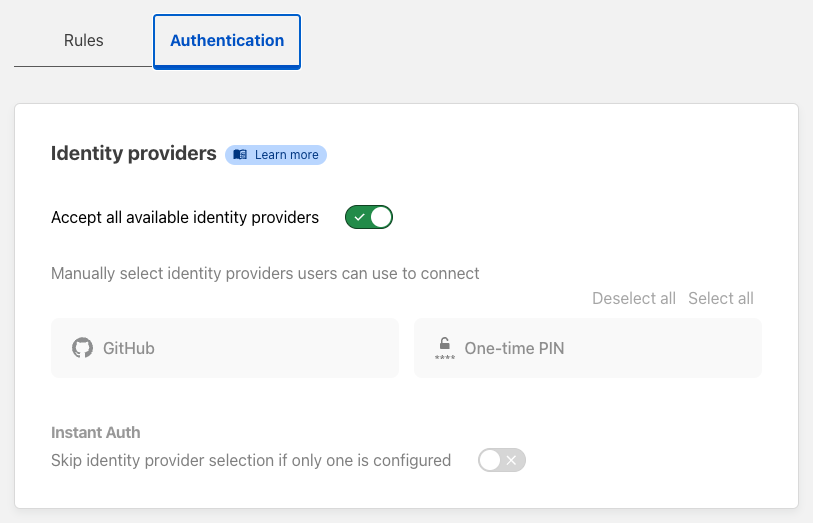
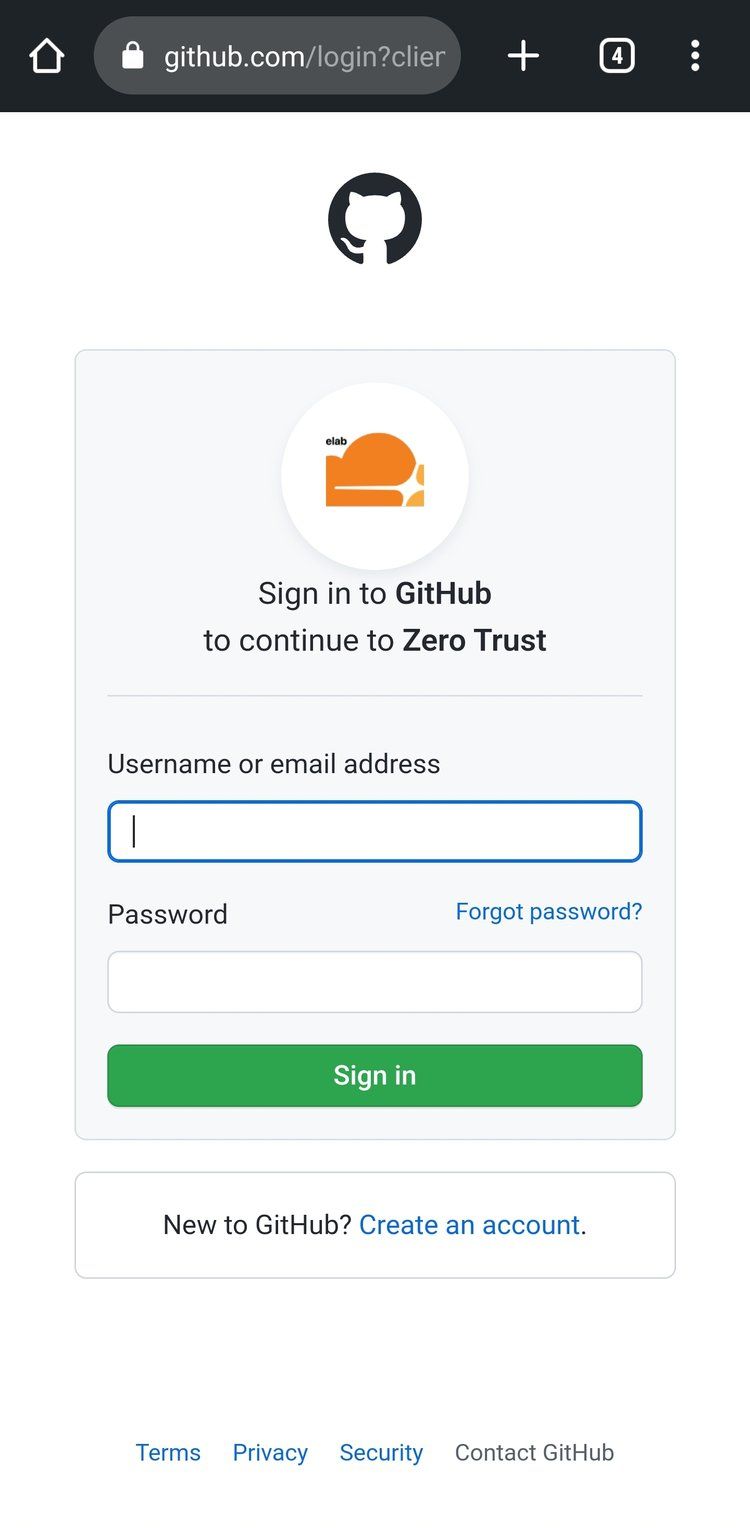
Head over to Settings->Authentication to add your first Identity provider. Instead of managing usernames and passwords, you can leverage services you already use. From Google and Microsoft to LinkedIn and Github, the built-in providers have you covered and are relatively easy to set up. I've used GitHub for this example. Select GitHub and follow the instructions which walk you through setting up a new OAuth application. Another quick and easy option is to leverage the passwordless pin to avoid going through the OAuth setup. The purpose of the Identity provider is to Authenticate the User and return at least a name and an email, which is the foundation of a User in Zero Trust. That User can then be added to Access groups, which you'll use when setting permissions for application access. Only authenticated users that match the Access policies will be authorized.
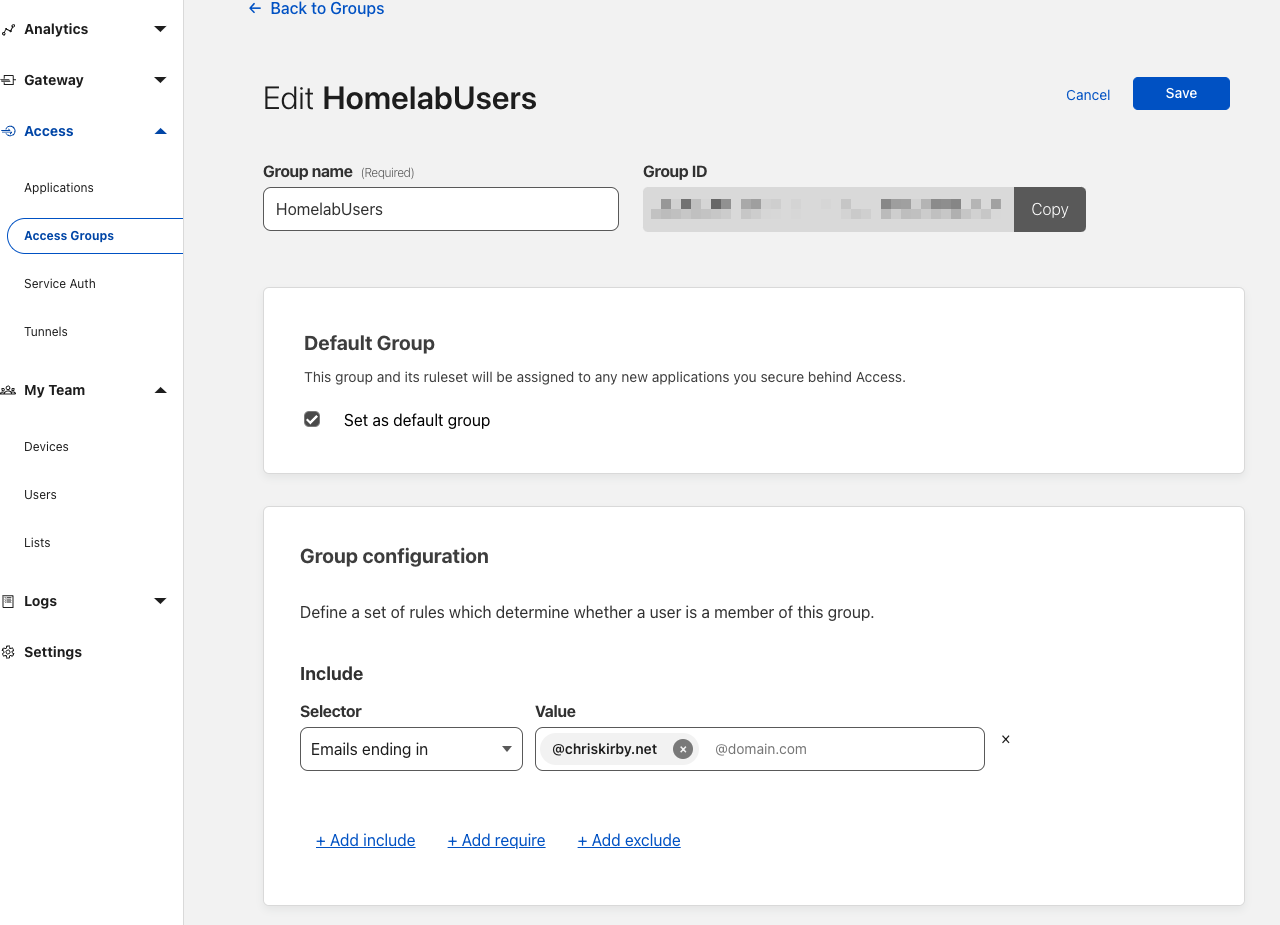
I have a default access group that assigns those with a chriskirby.net email address to the default HomelabUsers group.
Application Policies
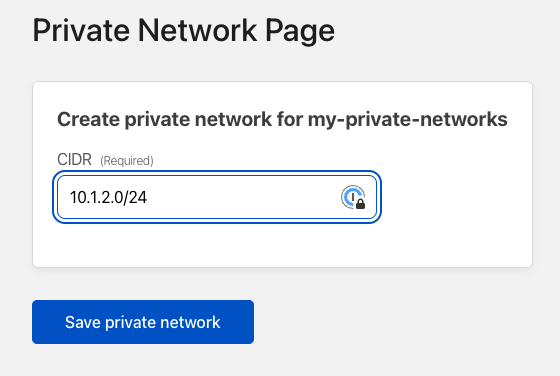
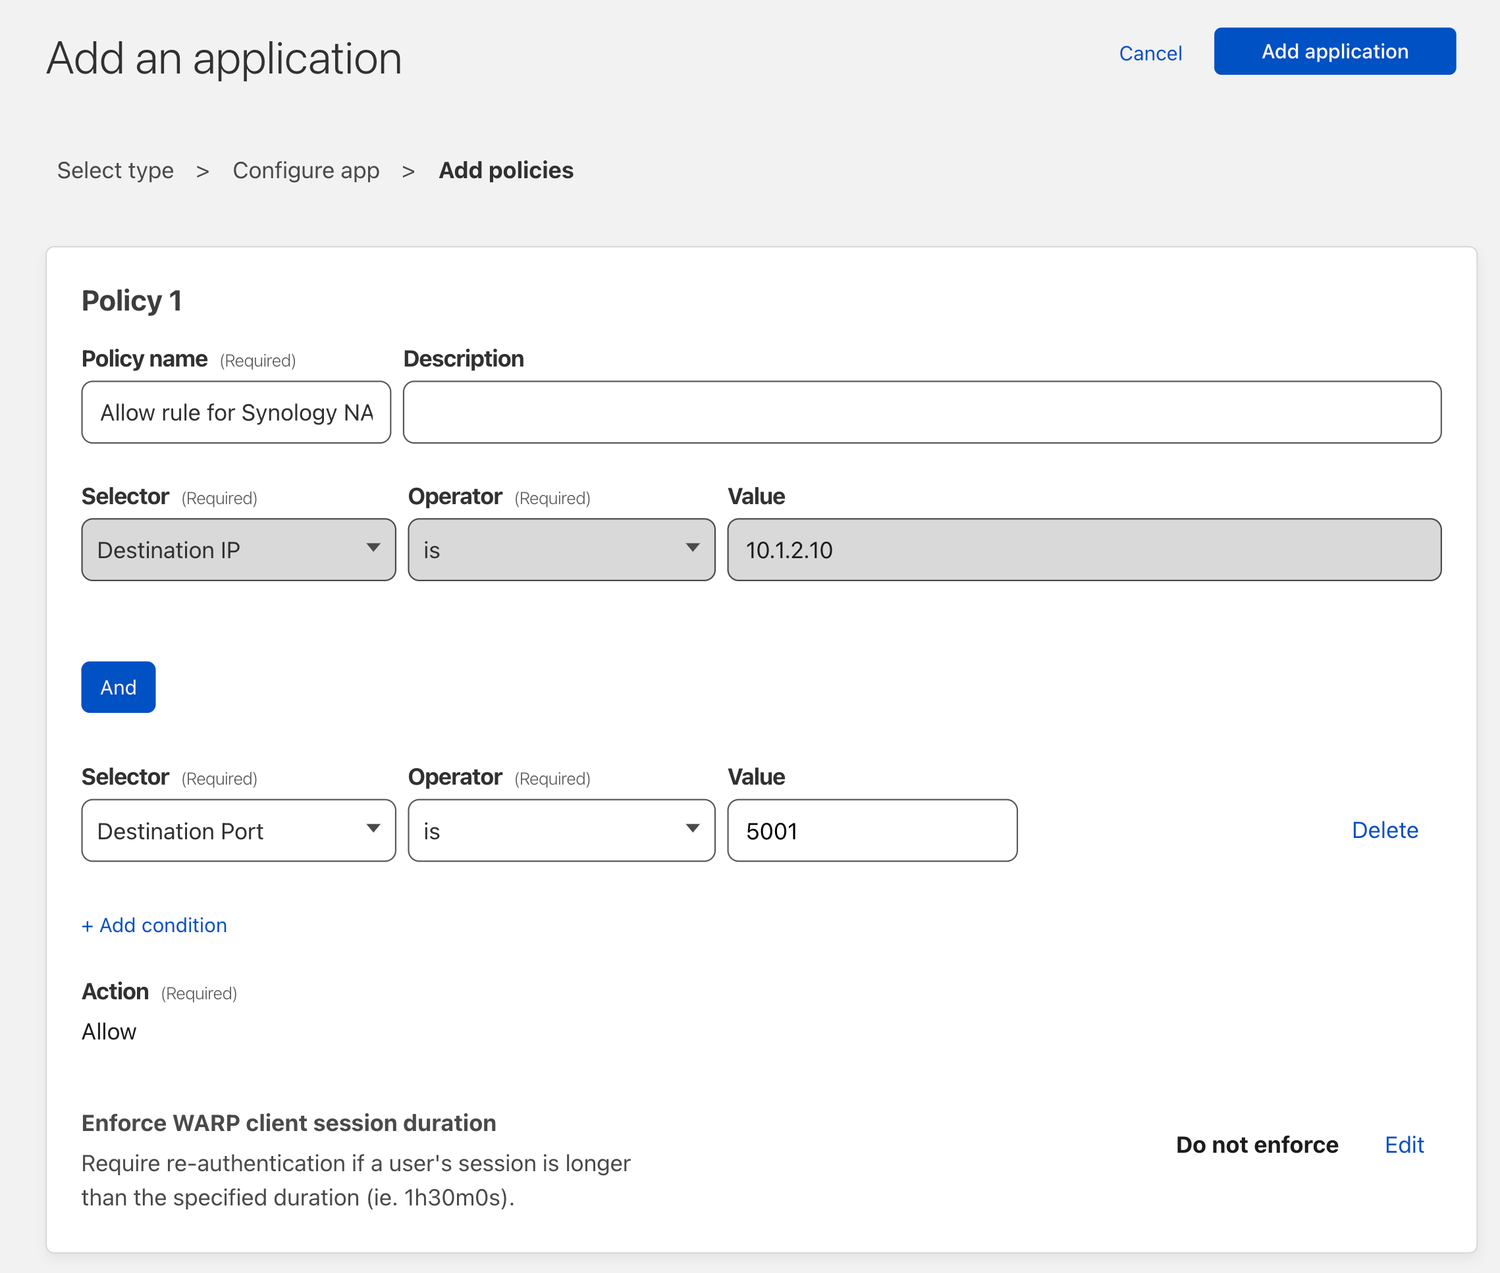
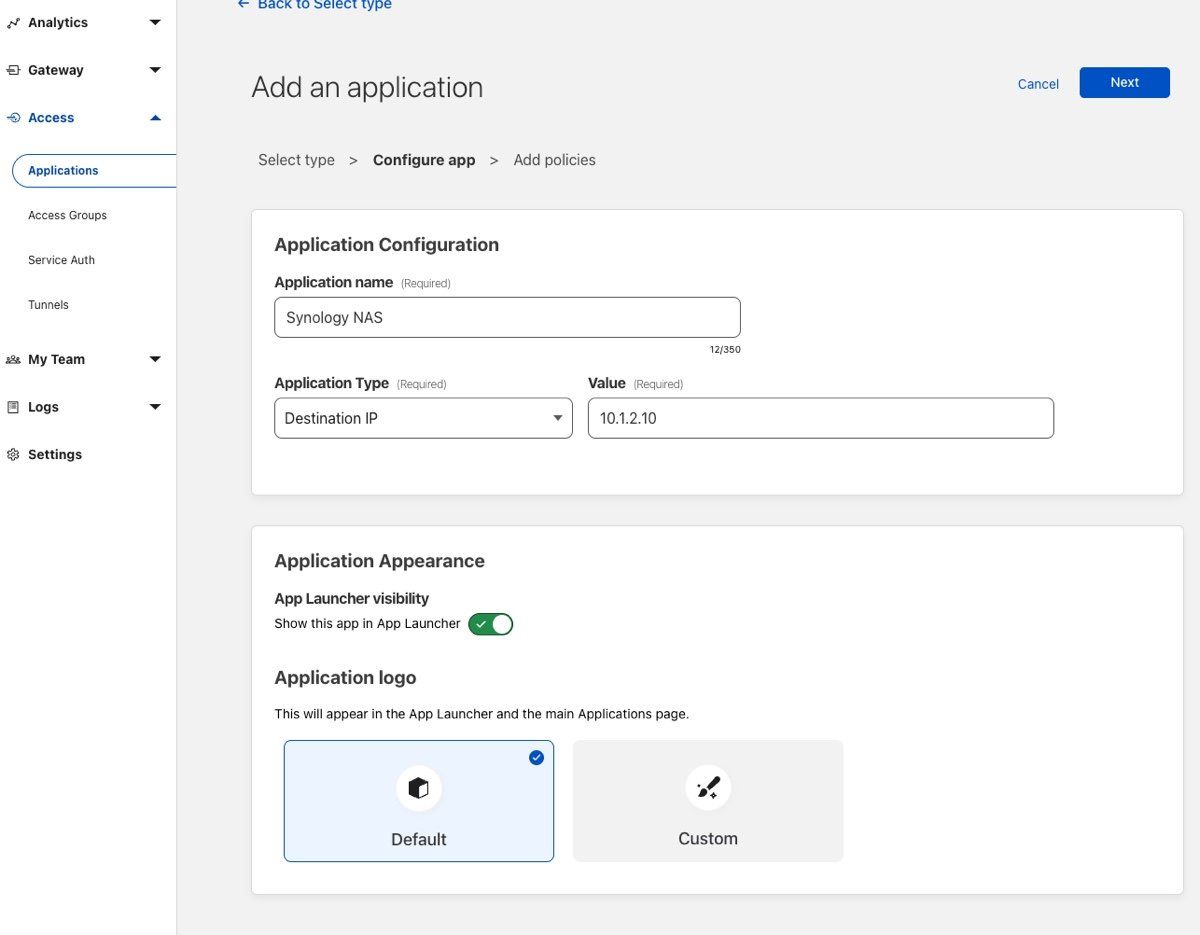
In this example, I'll create a new Private network application to my Synology NAS, which I want regular remote access to but want to avoid exposing it with public DNS. If that is a better solution for you, check out this post on how to do that securely with a Cloudflared tunnel.
WARP Client Settings
It's time to set your warp client settings and enroll your first device! First, head to Settings→WARP Client. Here is where you can select all your client administration settings, which is typically more critical for a business workforce than my homelab, so I keep these settings pretty relaxed. Focus instead on the Device Enrollment Permissions to ensure you have at least one rule that assigns a group of users to connect and at least one identity provider enabled.
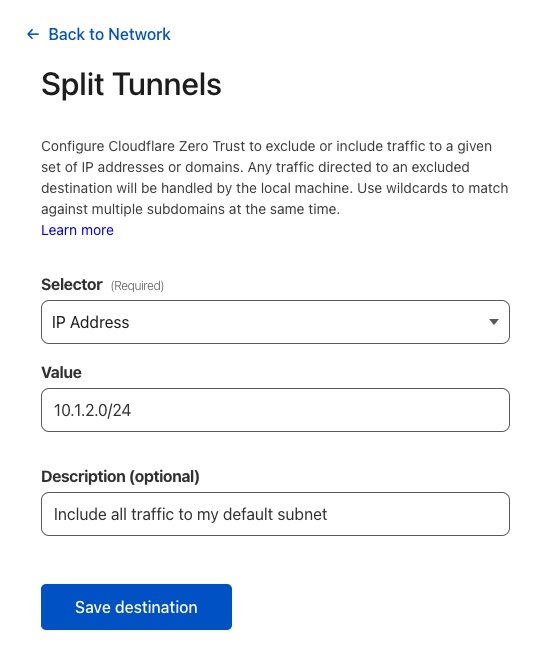
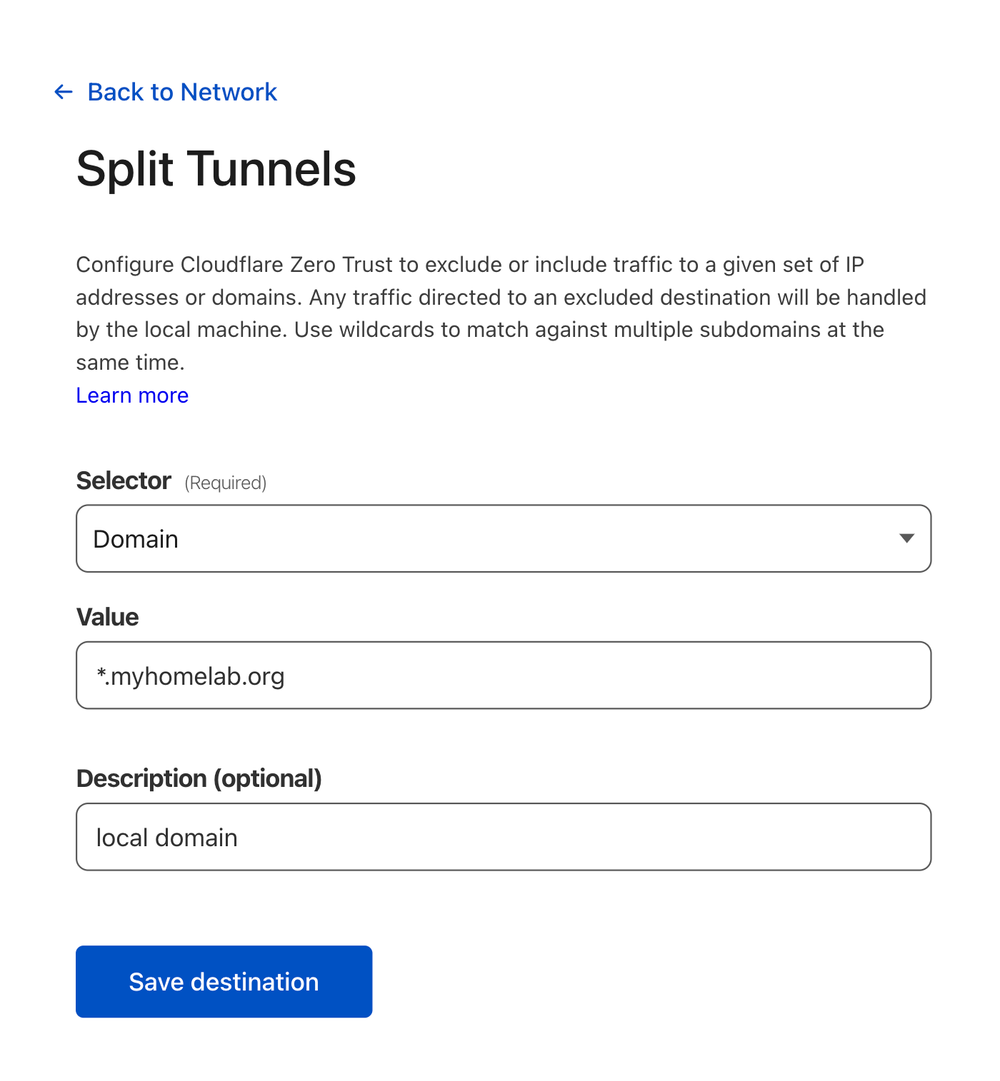
Split Tunnels
You'll need to tell Cloudflare to split any traffic to your local subnet and send it through your new private tunnel. Settings→Network→Split Tunnels, Settings, scroll to Split Tunnels, change to Include IPs and Domains, then Manage to add your 10.1.2.0/24 subnet and local domain. Now when connected to WARP on your devices, traffic to that subnet or domain will be sent through Cloudflare back to your local network through your Cloudflared tunnel.→WARP Client→Profile settings→Configure
Device Setup
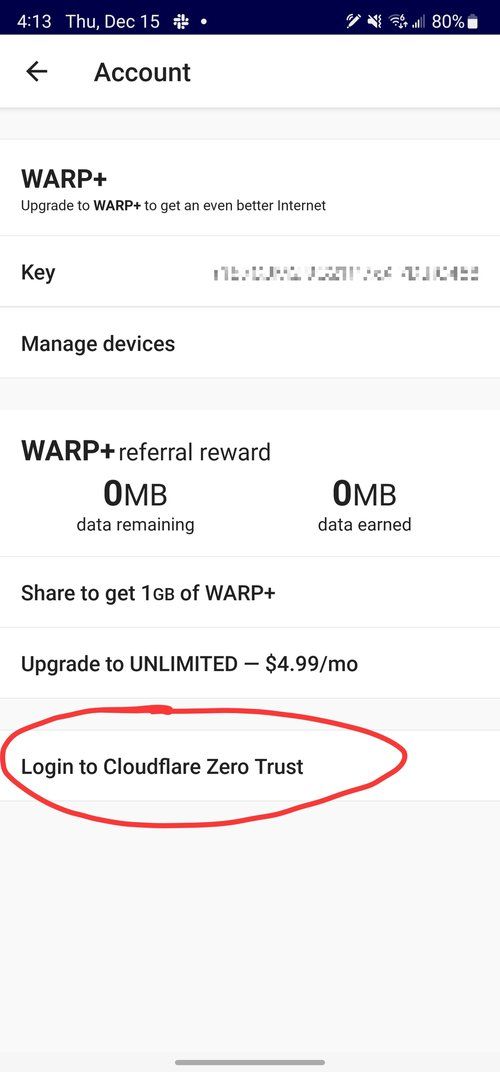
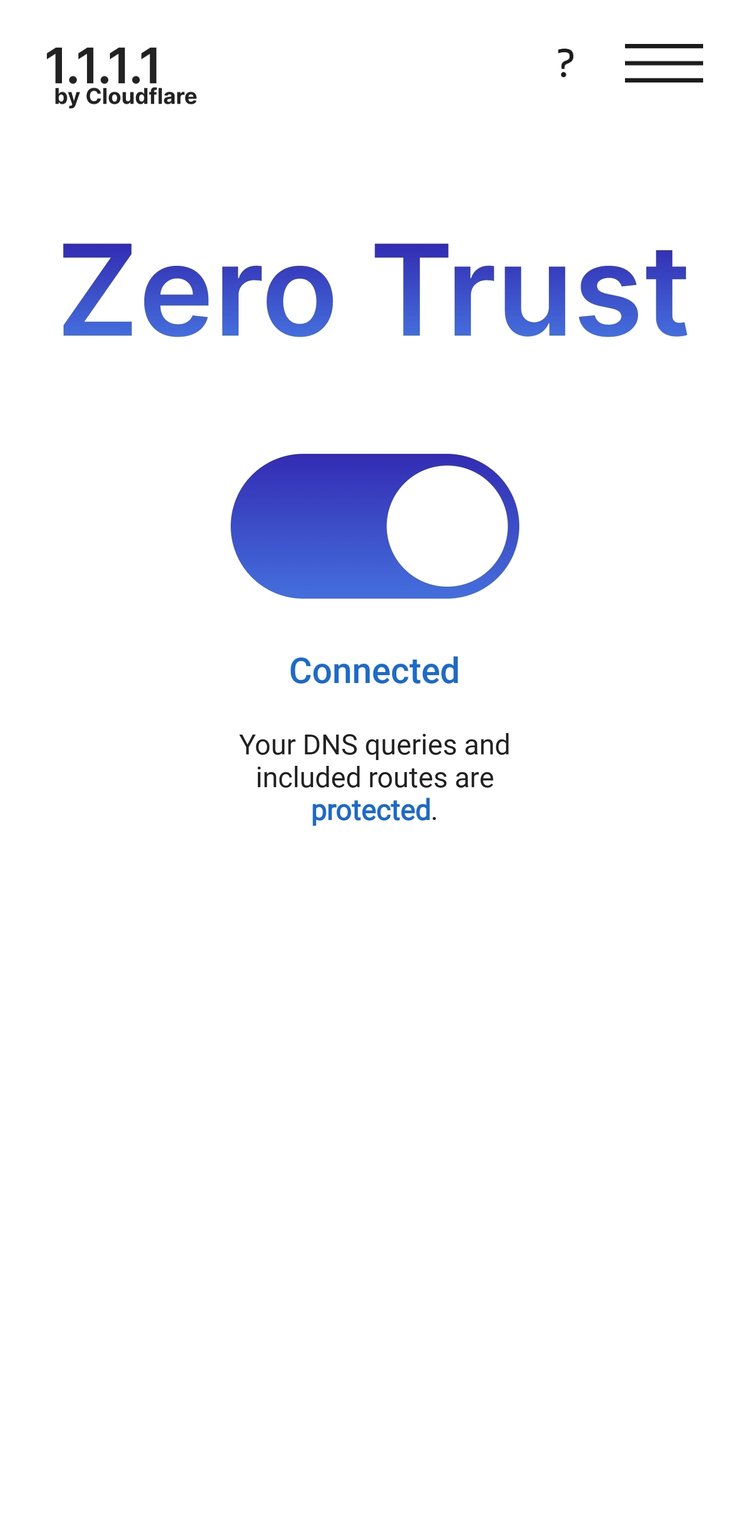
Install the 1.1.1.1 / WARP app from your app store, or grab the link from Cloudflare. Once installed, you'll need to navigate to the account menu, enter the team domain you set up initially, and then log in with your identity provider. If you set everything up correctly, you now have secure DNS and secure remote access to the applications you set up in the previous steps.
Considerations and Tips
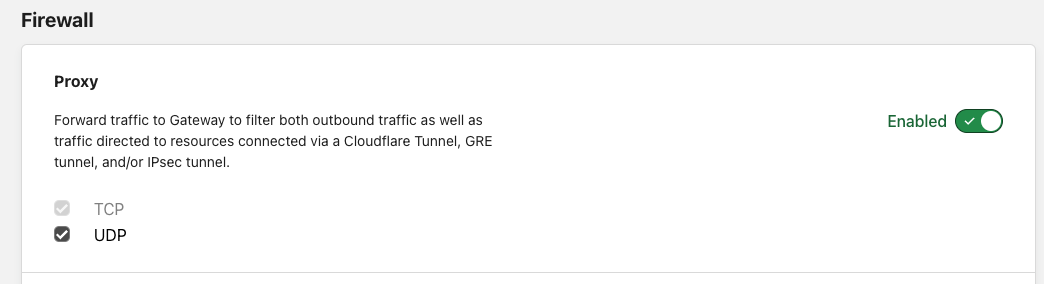
Turn on the firewall proxy and enable the UDP protocol under Network on the Admin Console
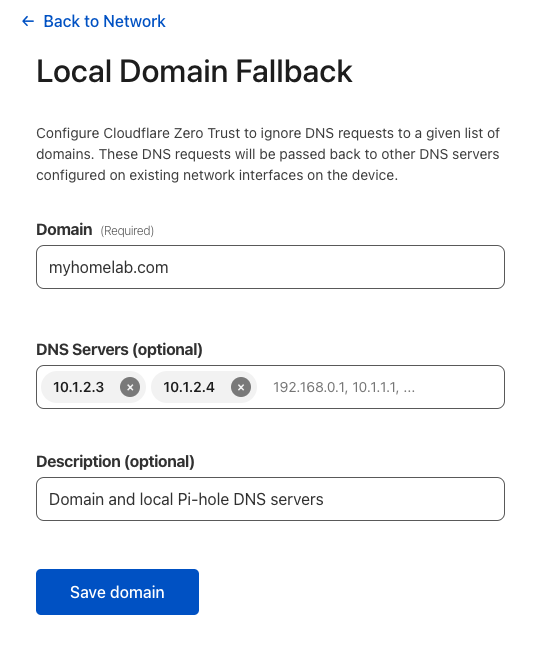
Local Domain Fallback
If you use a local domain within your homelab, and I recommend you do, then configure it within the Local Domain Fallback entries, along with any local DNS servers that you may use. For instance, I have 2 Pi-hole DNS servers on my local network, which I use to resolve A and CNAME records for my local domain. I want WARP to leverage those within my private tunnel, so this is where you configure that. Navigate to Settings:→WARP Client→Profiles→Configure
Combine Pi-hole with Zero Trust
Pi-hole is one of the best ways to block ads, telemetry, and trackers across your entire network, which can easily be configured with DoH using Cloudflare's public DNS. However, with Zero Trust enabled, you can add an additional layer of security by sending all Pi-hole DNS queries. Simply add a new DNS Location, Gateways->DNS Location->Add Location, and you'll have your own custom DoH, TLS, and IPv6 addresses to use with your Pi-hole DNS servers. Check out my Highly available Pi-hole setup with secure DNS queries to Cloudflare post and add the --upstream command to your service config. Now you can create DNS Policies across your network or apply them to specific users or groups! Check out the DNS Policy docs to unlock your additional superpowers.
Resources
Extending Cloudflare’s Zero Trust platform to support UDP and Internal DNS
Download WARP · Cloudflare Zero Trust docs
Last updated 1/26/2023