Migrating from Pi-hole to AdGuard home, with some upgrades along the way
I'll walk you through quickly migrating your Pi-hole configuration, including ad lists, whitelists, and custom DNS, to AdGuard home. Improving performance along with enabling TLS encryption, DoH, DOT, and deployment to Kubernetes

First off, I still love and use Pi-hole, which, for now, remains part of my ad blocking and local DNS. However, it's not without its downsides. For years, Pi-hole has been the go-to solution for network-wide ad blocking, and for good reason. It's practical, lightweight, and easy to set up. Many articles on this site talk about the various ways I've used and deployed pi-hole over the years. However, as my home network becomes more complex, I continue to increase security and level up ways to configure, deploy, and maintain my home lab. Pi-hole shows its limitations when you want features like DoH and DOT locally and DoH for upstream DNS. It's also challenging to deploy fully configured, lacks advanced filtering, and has an aging interface that could use design and performance improvements. I've worked around many of these challenges, however there are alternatives worth considering, and this article is about exploring and configuring one of the most popular alternatives, AdGuard home. From advanced filters to built-in parental and safe browsing controls, local and upstream DoH, and overall performance as a single Go binary, many compelling reasons exist to consider making the switch yourself. However, there were a few challenges to solve for me to consider this as a complete replacement.
We'll cover
- Automatically converting most, if not all, of your Pi-hole configuration to an AdGuard-supported format. Lists, Filters, and even local DNS.
- Creating a verified TLS certificate, configuring it with AdGuard, enabling SSL web interface access, DNS over HTTPS (DoH), and DNS over TLS (DOT) locally.
- Complete configuration via the AdGuard configuration file, allowing you to make changes and deploy them locally or from Git.
- Deployment to Kubernetes via Helm, with a custom values file configuring and deploying all of the above.
Let's first establish a baseline of what we must accomplish, with the underlying goal of losing no existing functionality. Check out this post as an example starting point. The tldr; network wide ad blocking with curated and updated open source ad lists, all upstream DNS over DoH, local DNS resolution, and deployable as a container via Docker or Kubernetes.

Migration
Nearly every feature of AdGuard home can be set via their yaml-based configuration file, which I'll reference in each area of migration below, along with new functionality. We won't cover every feature, but I'll call out some options to consider or chat with AI about what makes sense for your environment along the way.
First, run a Teleporter backup Settings->Teleporter->Backup on your Pi-hole instance, and then download and extract the archive. You'll need these files for some of the following migration scripts.
pi-hole-backup/
├── dnsmasq.d/
│ ├── 01-pihole.conf
│ ├── 05-pihole-custom-cname.conf
│ └── 06-rfc6761.conf
├── etc/
│ └── hosts
├── pihole-FTL.conf
├── custom.list
├── dhcp.leases
├── setupVars.conf
├── client_by_group.json
├── adlist_by_group.json
├── domainlist_by_group.json
├── client.json
├── group.json
├── domain_audit.json
├── adlist.json
├── blacklist.regex.json
├── blacklist.exact.json
├── whitelist.regex.json
└── whitelist.exact.json
Migrate Adlists
The first good news is that the lists you use for Pi-hole will work with AdGuard out of the box. Adlists will now be DNS blocklists. This is just a matter of converting from one format to another, and I used Claude to help me generate a Python script to do just that.
pip install PyYAML
python migrate_adlists_filters.py pi-hole-backup/adlist.json > filters.yaml
sudo sqlite3 /etc/pihole/gravity.db "SELECT domain FROM domainlist WHERE enabled = 1 AND type = 1;" > blocklist.txt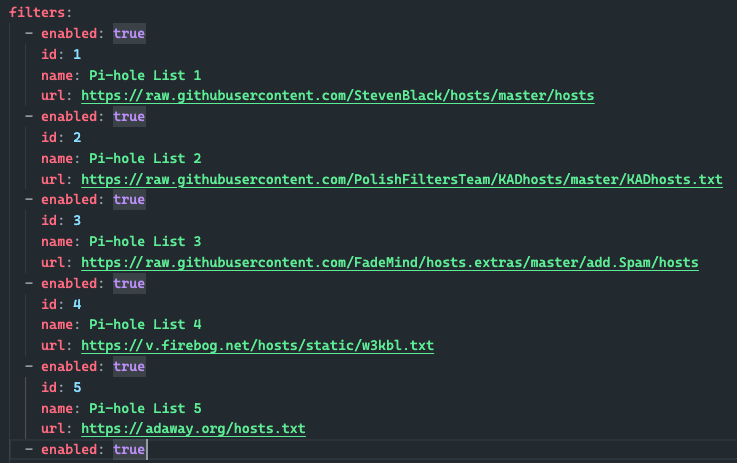
Whitelists and Blacklists
This is a little more complicated, as Pi-hole allows you to define four types of domain rules, whitelist exact & regex, and blacklist exact & regex. With regex rules, you may need to adjust some based on the complexity, as AdGuard's interpreter may differ. This script takes all four input JSON files and outputs user_rules: yaml for your configuration file.
python migrate-domains-user-rules.py pi-hole-backup/whitelist.exact.json pi-hole-backup/whitelist.regex.json pi-hole-backup/blacklist.exact.json pi-hole-backup/blacklist.regex.json > user_rules.yaml

Local DNS resolution
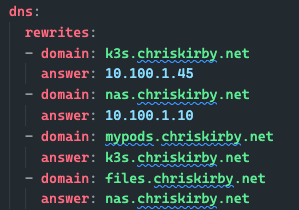
I've relied on Pi-hole to resolve my local DNS records by creating A and CNAME records for all my homelab resources. Managing those records in AdGuard is less straightforward as it does not have first-class local DNS management like Pi-hole. With that said, we can accomplish the same thing by using the DNS rewrites rules feature. If a request comes in for mywebsite.chriskirby.net, you configure the response to be 10.100.1.45, which simulates an A host response, or it could respond with k3s.chriskirby.net, which simulates a CNAME response. The request is not sent upstream and still shows in the query log as a rewrite, not a resolved DNS entry. It's not as elegant, but it works just fine. Here is how you can convert your DNS records into the corresponding rules.
python migrate-dns.py pi-hole-backup/custom.list pi-hole-backup/dnsmasq.d/05-pihole-custom-cname.conf > dns_rewrites.yaml
DoH upstream
This one is easy and requires no special conversion. Instead of having to relay through a cloudflared proxy to ensure my upstream was encrypted, AdGuard home supports this out of the box.
upstream_dns:
    - https://cloudflare-dns.com/dns-query
    - https://dns.google/dns-query

Configuration and Deployment
with TLS to Kubernetes
Get your certificate
I will cover one common way to do this via Let's Encrypt. However, there are many other ways to generate your certificate. However, using acme.sh combined with Cloudflare will do away with those annoying privacy warnings when accessing services locally over TLS, like your UDM-Pro, using the default private cert. The steps are simple, but you'll need a few things to get started:
Get a Cloudflare API key
From your free (or paid) Cloudflare account with both DNS modify and read permissions on the Zone (domain/website) you want to use for your certificate. We'll generate a wildcard certificate so that this certificate will work for many other services you have that support custom certificates, like your NAS, Proxmox, or Unifi. Cloudflare Dashboard -> Manage Account -> Account API Tokens
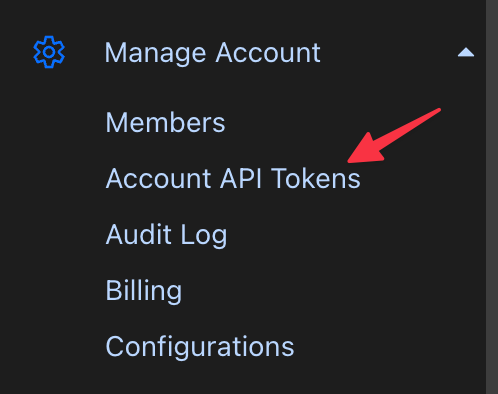
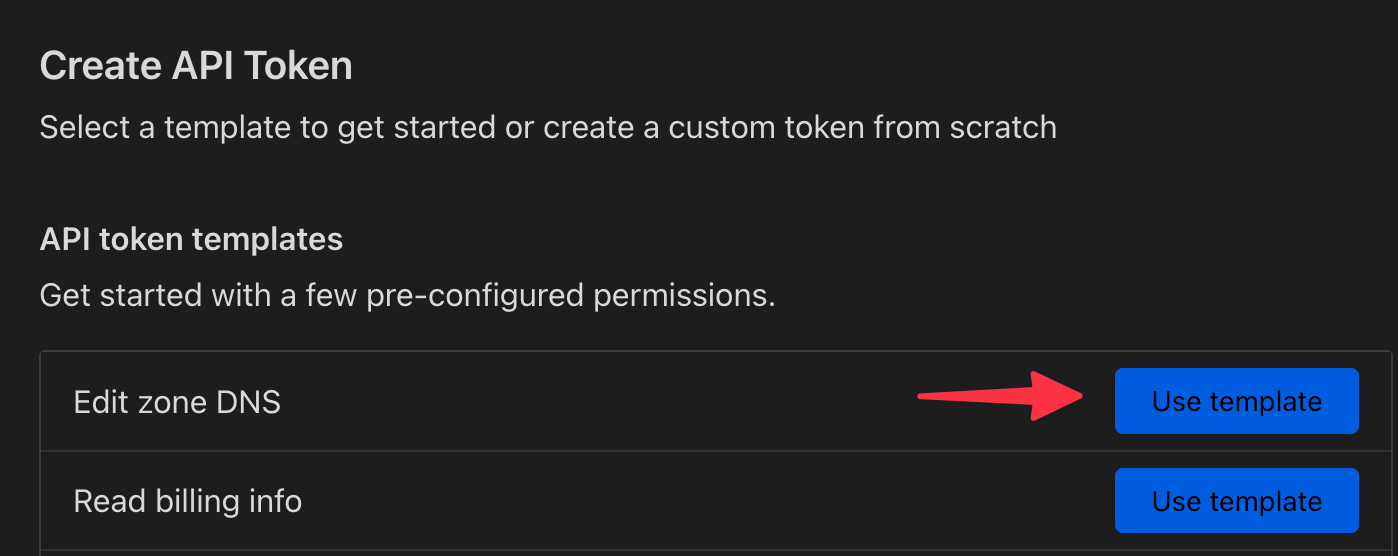
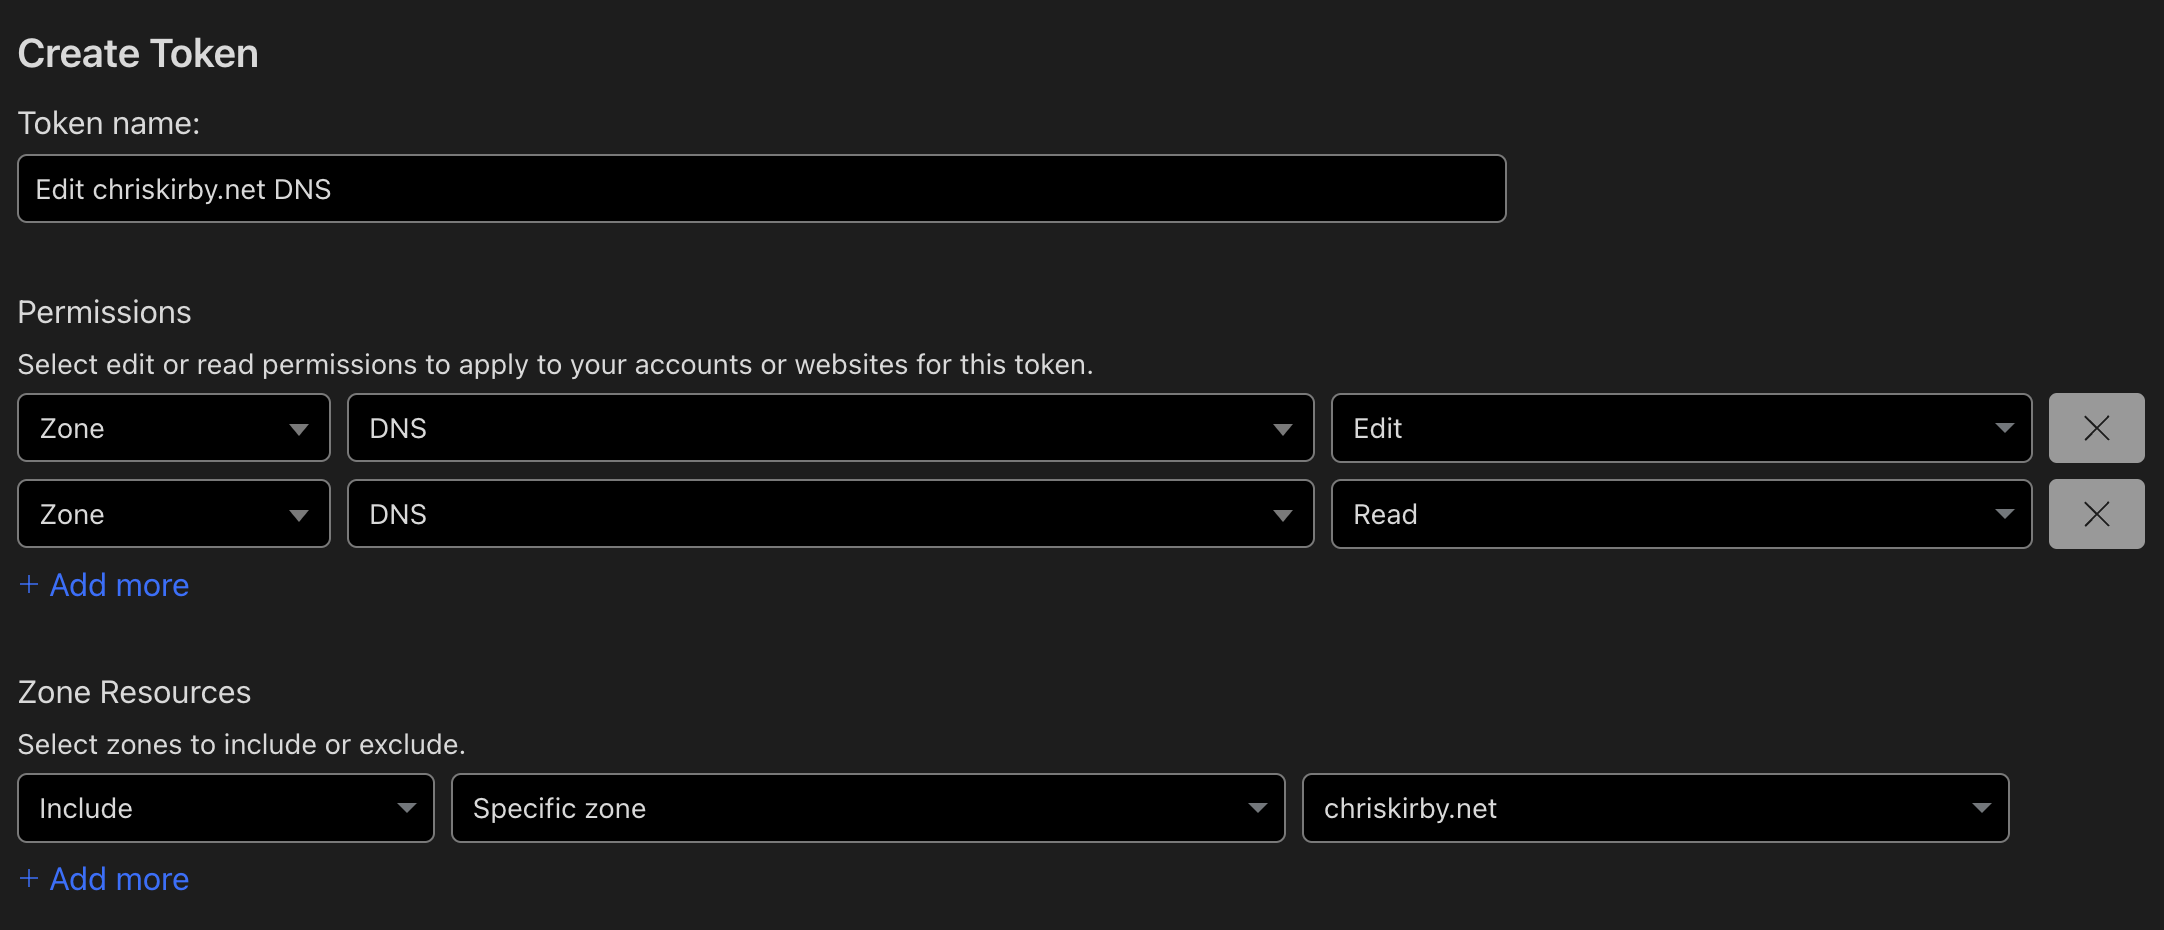
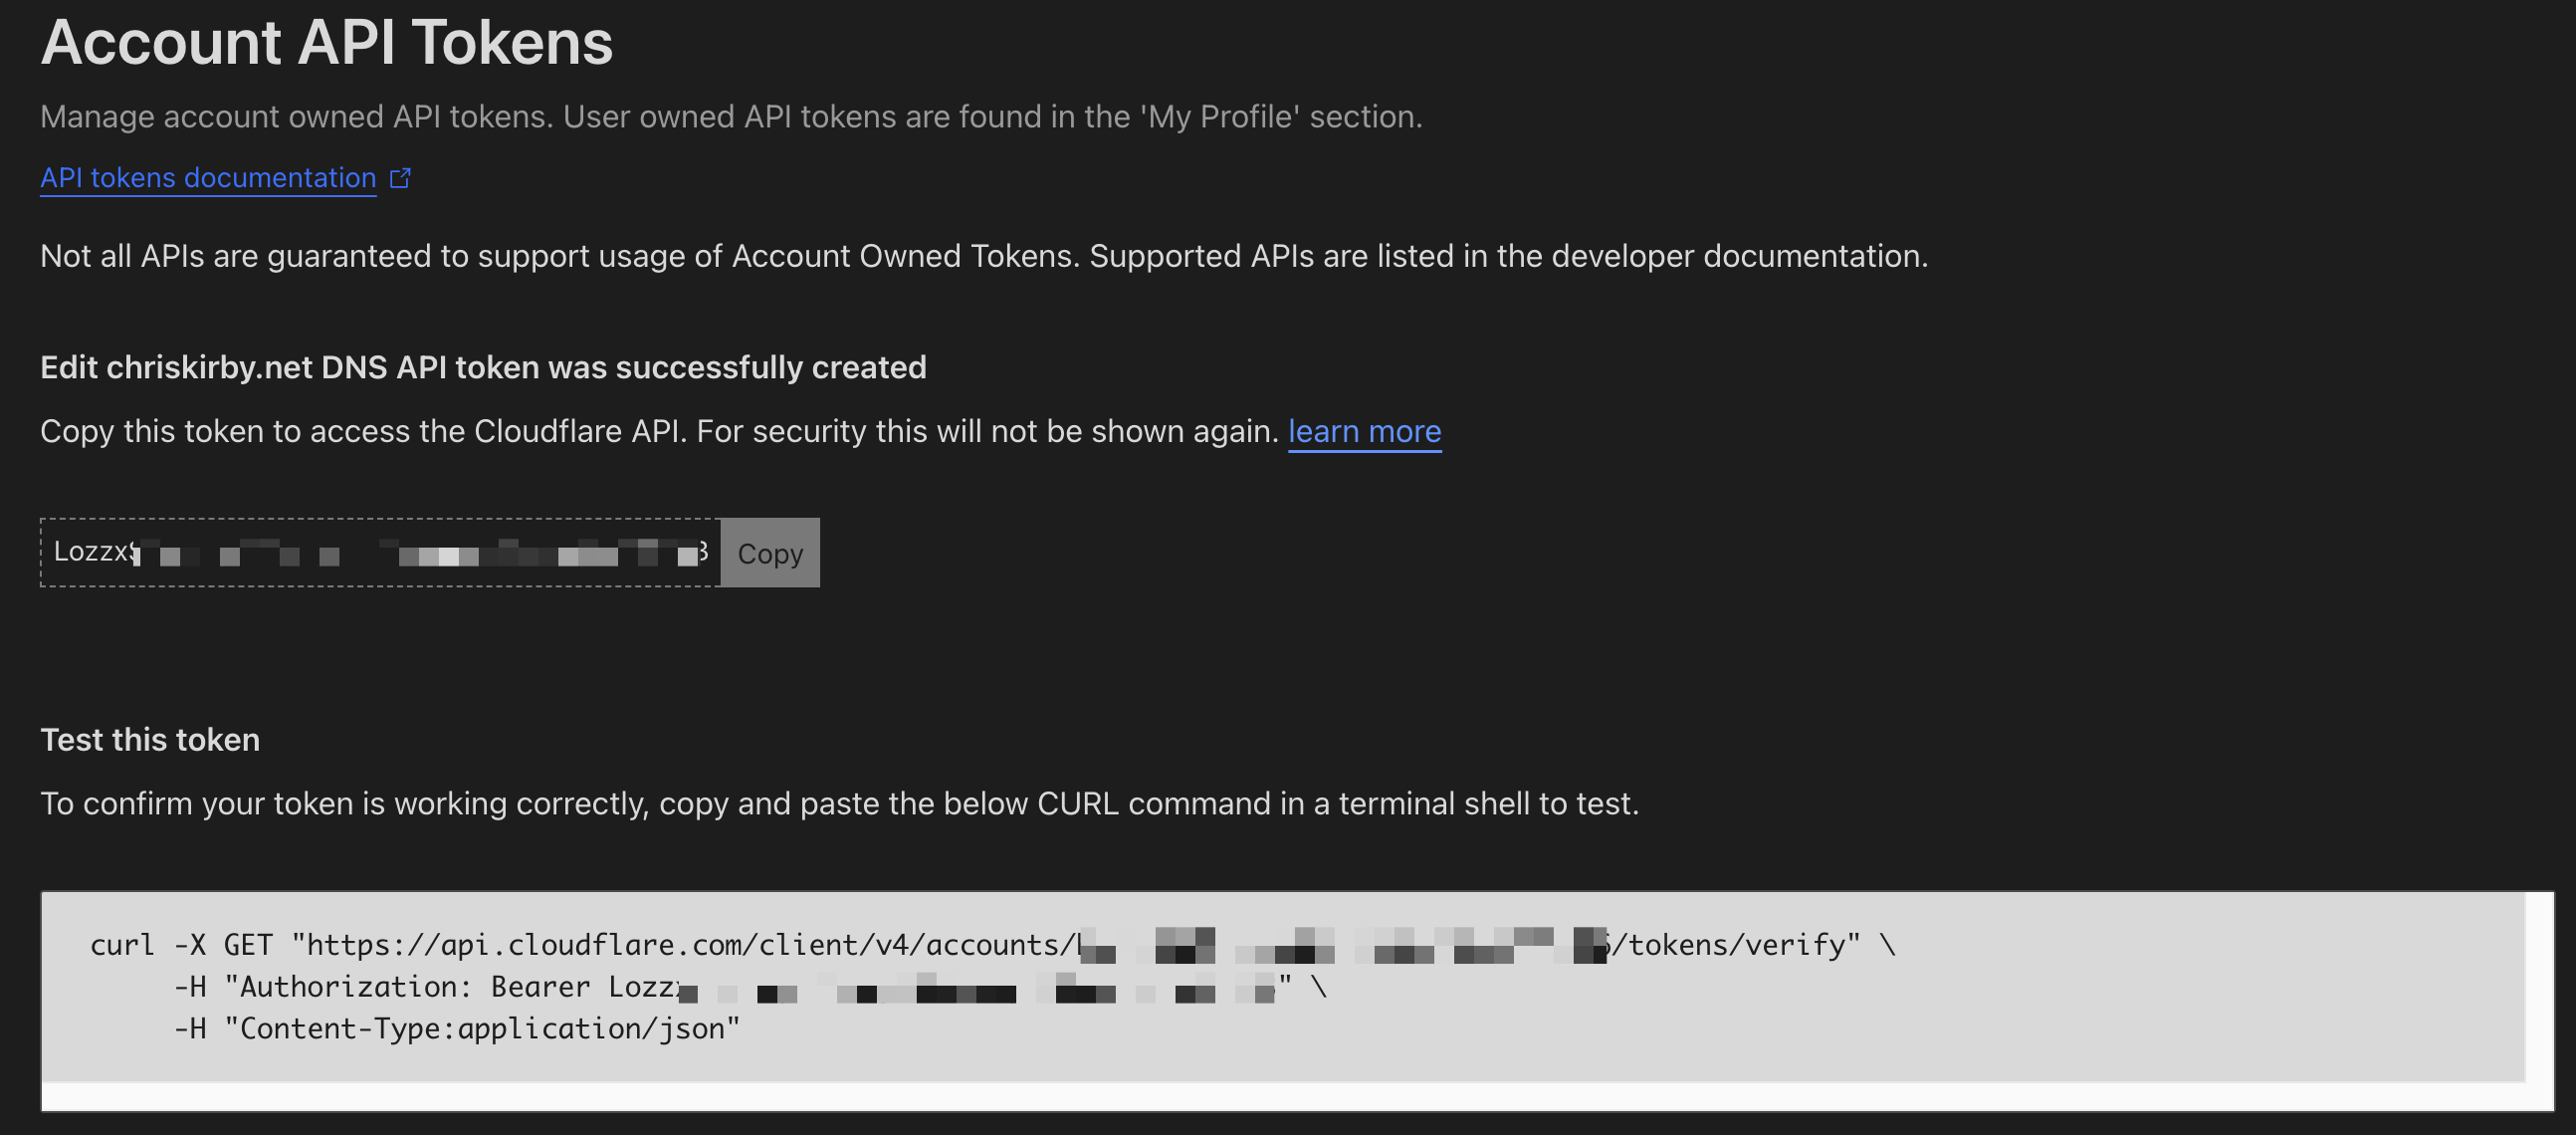
Screenshots of the Cloudflare dashboard when creating a new API Token
Generate with acme.sh
Install acme.sh and any dependencies you may need that aren't included with the install script.
# Mac via homebrew
brew install curl socat openssl coreutils
# Ubuntu or WSL
sudo apt update && sudo apt install -y \
  curl socat openssl ca-certificates cron
You now have the privkey.pem and the fullchain.pem files needed for your deployment!
AdGuard configuration
We now have everything we need to complete our configuration. Here is what your complete yaml file should look like:
Shipit 🐿️
Running AdGuard in Kubernetes adds some complexity. If your home lab isn't there yet, no worries! You can take everything you've done to this point and run your new AdGuard home instance via Docker or directly on Metal by following the community-supported guides. Enjoy!
If you are still here, then let's get into it. We'll be running some kubectl commands on our already deployed cluster and configuring our custom values for an existing open-source chart for AdGuard.
Namespace and secrets
Let's set up our namespace and create a secret resource to store our new certificate. We'll use that later to add it to a mounted volume for our pod in the helm deployment.
# Create the namespace
kubectl create namespace adguard-dns

# Create the TLS secret from your certificate files
kubectl create secret tls adguard-tls-cert \
  --cert=yourdomain-cert/fullchain.pem \
  --key=yourdomain-cert/privkey.pem \
  --namespace=adguard-dns

# Add annotation to prevent Helm from deleting the secret
kubectl annotate secret adguard-tls-cert \
  --namespace=adguard-dns \
  "helm.sh/resource-policy=keep"
# Add the Helm repository
helm repo add gabe565 https://charts.gabe565.com
helm repo update
Deploy via Helm
First, we need to create our custom values file, which allows us to override some of the default configuration options the chart provides. We can also do this via command line arguments. However, I find this method more straightforward to understand and manage. I'm adding a custom configuration for my service, using the LoadBalancer to ensure my DNS ports are accessible outside the cluster, similar to Host networking in Docker. In the persistence section, I'm using Longhorn for my storage provider and creating a custom mount for my TLS cert. Finally, I'm adding probes to ensure the pods start and remain healthy.
Deploy and re-deploy AdGuard home to your cluster.
# remove previous release, if any
helm delete adguard-home -n adguard-dns || true

# Wait for pods to terminate
kubectl wait --for=delete pod --selector app.kubernetes.io/name=adguard-home -n adguard-dns --timeout=30s || true

# remove the previous config which will be replaced by the new one
# the data pvc will remain
kubectl delete pvc -n adguard-dns adguard-home-config --force --grace-period=0 || true

# Install AdGuard Home
helm install adguard-home gabe565/adguard-home \
  --namespace adguard-dns \
  --values adguard-values.yaml \
  --set-file config=AdGuardHome.yaml \
  --set podAnnotations.recreate=$(sha256sum adguard-values.yaml | awk '{print $1}') \
  --atomic \
  --cleanup-on-fail \
  --force \
  --replace \
  --reset-values \
  --wait
Good luck, and feel free to let me know how it goes!


