Automate Nuget pack and push using Grunt and Node.js
Automation is fun, even when it's simple. If it makes sense, I try to automate as much as possible in my professional and personal life.

Automation is fun, even when it's simple. If it makes sense, I try to automate as much as possible in my professional and personal life. Even if it saves you five minutes in a work day, that's over 1.5 hours of time you get back every month. So, in this case, automating the build and publishing of the few NuGet packages I maintain will allow me to spend that captured time somewhere else. Granted, the return on the initial investment needs to make sense. If you're like me and often do things to learn them, then it's time well spent regardless.
Now, there are many ways to automate a Nuget pack and publish. Traditionally, I've done most of my automation with my C# projects using MSBuild and the Nuget.exe against a .csproj file. Use that method in combination with a build server like TeamCity or TFS, and you have a very nice reliable way of automating your package builds in your own CI environment. My goals, in this case, however, are a bit different. I wanted something portable and could run on the command line cross-platform, preferably without any external dependencies. Grunt, a hugely popular JavaScript task automation library, fits that bill perfectly. It's used in many popular open-source projects on Github and is quite helpful for any tasks that can benefit from cross-platform automation. It also has a very active community of plugin contributors to extend the system beyond its base capabilities. For the most part, for any task you can build in JS and run in Node, you can automate with Grunt.
To start with Grunt on Windows, you may need to do a few things to get your environment ready. First, install Node.js. The easiest ways are to grab the installer from the website or run from the command line if you have Chocolatey installed. Finally, you'll need to install the Grunt CLI tools via the Node Package Manager (npm). From the command prompt, type npm install -g grunt-cli which will install the CLI tools globally and add it to your system path. For more in-depth details on getting started with Grunt, see the docs here http://gruntjs.com/getting-started.
Package.json
The package.json file will define your build dependencies via the devDependencies property. This is technically not required, but it's very useful for quickly adding the grunt modules needed for your build via npm install. This will also keep you from committing the node_modules directory, which, like with the NuGet packages directory, is generally not something you want to do.
Gruntfile.js
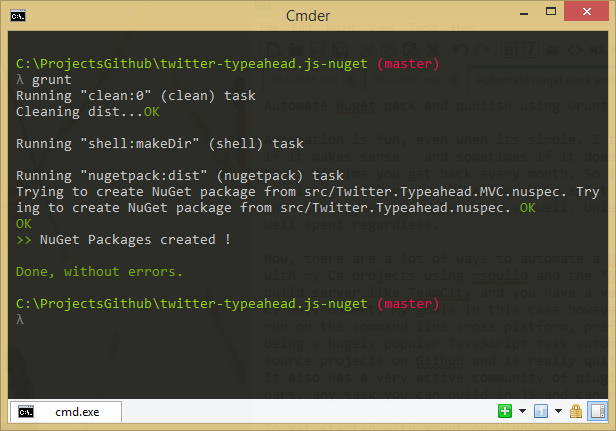
The Gruntfile is essentially your build definition. This is where you'll define and register all the tasks in your build. In this example, I'm defining two tasks, the default task and the publish task. The aptly named default task is what will run by default when you execute the grunt command, which is equivalent to grunt default. The second task publish is nearly identical to the default task with the addition of the nugetpush configuration.
This is a straightforward set of tasks, precisely what I was after. I'm utilizing the grunt-contrib-clean module to wipe the dist directory before the build. I'm then using the grunt-shell module to execute the mkdir command, ensuring the dist directory exists. Followed finally by the grunt-nuget module, which will allow me to both pack and push the NuGet package. If you dig into the node_modules directory, you'll find that the grunt-nuget module utilizes Nuget.exe and has wrapped most of its arguments for pack and push into the options parameter. As an alternative to this module, you could easily include your version of the Nuget.exe and use the shell module to accomplish the same thing. The module makes it a little cleaner since I won't have to carry the Nuget.exe in my repo, but everyone's requirements are different. Also, in the case of Nuget.exe, Mono would be required if running this on a non-windows platform.
Make it so


